After restoring the 1947 Singer Featherweight that I purchased in Apex, North Carolina a few months ago (as another pandemic project) I finally am able to work on the "matching" vintage sewing table. I'm assuming Eva, the previous owner, purchased the two together, just as I did from the store in Apex.
These were really cool, useful tables. They look like a card table when the insert is in the top, and it folds up like one, too. The top is a beautiful wood veneer, and the sides and metal legs are black. Singer made sure the folding table could be used for more than a sewing table! The photo below shows exactly how mine will look after I restore it....hopefully.

Just like "Eva" the Featherweight, my table suffered some water damage along one edge of the table top. My detective hat tells me it, and the machine in it's case, were stored in the same place together. The case had water damage in the bottom and the machine did, too. It's not uncommon to find tables and machines that need TLC because of some mishap.
After doing a bunch of research on what to do, I settled on a wonderful blog post that explains the entire process: "Refinishing a Vintage Singer Sewing Table" at Still Stitching. I made my list of supplies and was able to get most all of it (except for the black Valspar furniture paint) at my local hardware store to the tune of about $56. So to begin.......
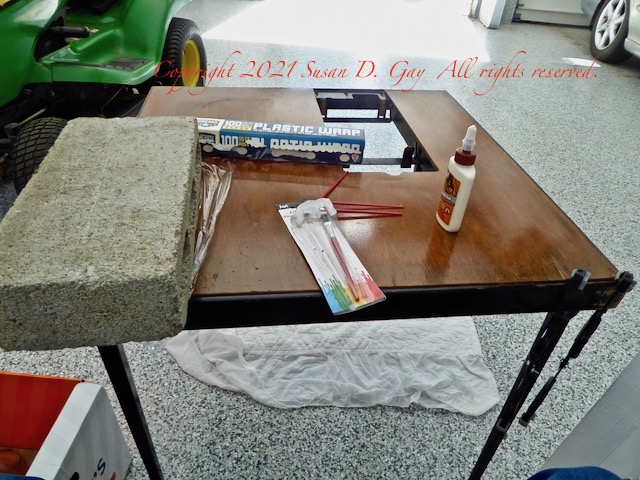
I found a twin mattress cover in the linen closet to use for padding on the garage floor. Perfect size. I grabbed a clean rag and wet it to wipe the table down from top to bottom. Then the glueing began.
The veneer on the water damaged side had a few places that needed glue. I squeezed a bit of glue onto one of the brushes and dabbed it in and under the veneer, then wiped away any excess with the damp rag. I had some small clamps to use, but they're lightweight for only a single, small repair.

I used cheap brushes from Dollar Tree with the Gorilla wood glue. Some of the varnish is coming up in one corner...not sure what I'll do with that just yet.
But the rest of the table top is in pretty darned good condition considering it's age of 74 years (hopefully I'll look as good at that age!!).
I found another place to glue: the left corner. But I wondered what to use to weight it down since I had no more clamps....Necessity is the Mother of Invention: a heavy cement block!! After glueing I put some plastic film down to keep the glue from sticking to the block, and the block, from damaging the table.
I located another small spot on the right...but what to use for this one? How about a bag of leftover fire pit glass rocks with plastic underneath. Heavy enough and again, it works like a charm.

So much for the first day of work on the Singer Folding Sewing Table. The glue has to set for 24 hours, then I can move on to removing the hinges and legs. I love bringing these vintage Singer items back to life!
No comments:
Post a Comment
Send me your comments and thoughts..I would love to hear from you!