This pandemic is the perfect time to go through my UFO box...yes, just one box...and decide what to work on to while away the days while staying home. I can wallow in my sewing room as much as I want and not feel guilty about not running errands, attending meetings and passing up my Pilates classes. It also keeps me focused and calm...something much needed during these crazy times.
I pulled out the easiest project and completed that: a silk ribbon flower kit from Camera Nitschke of The Ribbonry. It was sort of flattened, so I fluffed it up and touched the iron tip to the pink petals to revive them. The leaves were completed already so it was a matter of mounting the flower and leaves and turning it into a pin. I had purchased enough of overdyed red silk bias ribbon to make another one, so I did. Here are both flower pins:
Next on the project list: a whitework etui by Wendy Schoen that's copyrighted 2006....14 years ago.
When I pressed it I found the originally-traced design was not visible. We must have used a washout marker of some sort in class that fades with time. I retraced it in pencil using the previously completed embroidery to guide my re-drawing of the design. The fine linen and embroidery had slightly yellowed and the old tracing was barely visible, ever-so-slightly brown. When finished I will have to soak it in plain water for a day then soak in Oxyclean to get any stains out before stitching it all up on the machine. Below is what was done in class before the project was packed away in the UFO box:
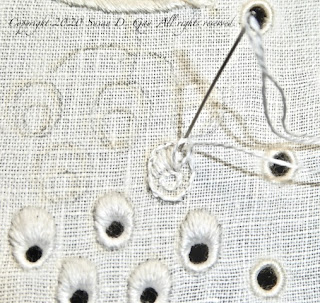
I've started the shaded eyelets (only one was completed in class): not my favorite type of eyelet. Split back stitch is used to outline the outer and inner circles.
Then the widest part of the circle if filled in with tiny lazy daisy stitches to pad.
Straight, horizontal stitches are applied over the lazy daisies to complete the padding prior to satin stitch.
Then the eyelet is opened with an awl up to the split backstitches of the smaller, inner circle.
After changing out to a new single strand of cotton floss, the satin stitch begins on the left side horizontal and proceeds counter clockwise around the oval. Below is the completed shaded eyelet. Each one takes about 25 minutes from beginning to end.
There's a lot of work to this project: the etui itself, a covered and embroidered measuring tape and a pin disc. But while working this I work on other projects intermittently (yesterday I oiled and cleaned my 1935 Featherweight to keep her in tip top shape) to keep from getting bored.
So keep busy, stay calm and stitch on!!


No comments:
Post a Comment
Send me your comments and thoughts..I would love to hear from you!